A good shipping experience should go beyond getting products from A to B, it should serve the business and help promote return customers. However, it often costs a lot of (manual) work which leads to time restraints or even shipment delays.
Each day you fill manually processing orders, communicating back and forth with a carrier, and trying to find answers to customers’ questions regarding shipment statuses, you’re missing the chance to develop and market your business.
This guide will provide you with the knowledge needed to automate your business’s shipping processes from label creation, carrier services, picking and packing to how you handle your returns.
What to expect from this guide?
- Automate your shipping through leveraging delivery settings in your checkout. With Sendcloud customers can choose their desired delivery options for example next day delivery.
- A separate picking and packing process is no longer necessary, using Sendcloud you can print your picking lists and packing slips together with shipping labels. In turn, you can offer faster order fulfillment times to customers and improve your accuracy.
- Speed up the entire process with smart shipping rules. You can pick one or more shipping conditions, these are then checked against all incoming orders. If the conditions are met then the shipping rule is applied to the order – It’s as simple as that!
- Customers expect to be kept in the loop when it comes to the dispatchment and delivery of their orders. Keep customers informed with track & trace emails and reduce potential costs caused by delays and missing packages.
- Sendcloud will help you treat your returns as an opportunity to connect with your customers and build loyalty. Master reverse logistics through a branded returns portal and increase conversions, retention, and profitability with personalized Track & Trace emails and page.
Optimize the checkout to improve conversion rates
It goes without saying that the checkout is the store’s most crucial function, however, common mistakes often occur which lead to shopping cart abandonment.
Based on a number of different e-commerce studies, the average shopping cart abandonment rate is 68.81%.
One way to optimize your checkout is to offer flexible delivery methods in your checkout. This shows your customers that you care about their convenience. Remember that the delivery experience has a direct effect on customer satisfaction and their overall shopping experience.
Avail of multiple carriers and calculate your shipping cost
No two carriers offer the same service, by allowing customers to choose you enable flexibility and you can also improve your rates. Depending on whether you are shipping internationally or locally and the type of products that you are sending should all influence how you choose your carrier. To activate your carriers in Sendcloud simply go to ‘Carriers’ in the settings panel and select the carrier(s) you would like to use.
Once you have enabled your carrier, compare the prices by using the Sendcloud shipping calculator. Here you can compare prices and insurance coverage across all the carriers you have enabled in your account. You can set what country you are shipping from along with the destination country, the dimensions and weight of the package. Once calculated you can view all the available shipping methods to this country, plus the price and any included insurance.
Service Point Delivery
Service points are gaining momentum as a delivery and return method throughout Europe. Delivery companies offer thousands of parcel service points to make sure that there’s always a point nearby.
What is the Sendcloud service point picker?
To meet the growing demand for service point delivery, Sendcloud implemented a service point picker that allows your customers to select where they would like to pick up their package. Once your shop is connected to Sendcloud our solution displays the service point map in the checkout.
To enable the service point picker you will need to configure service point delivery in your shop’s backend. After enabling the service point delivery for the integration, it will be possible to activate service point delivery for each individual shipping method in your store.
Automated order processing for improved picking and packing
With Sendcloud you can manage how items are picked and packed, avoid errors and customer complaints on late deliveries. Sendcloud offers a number of features that can help streamline this process:
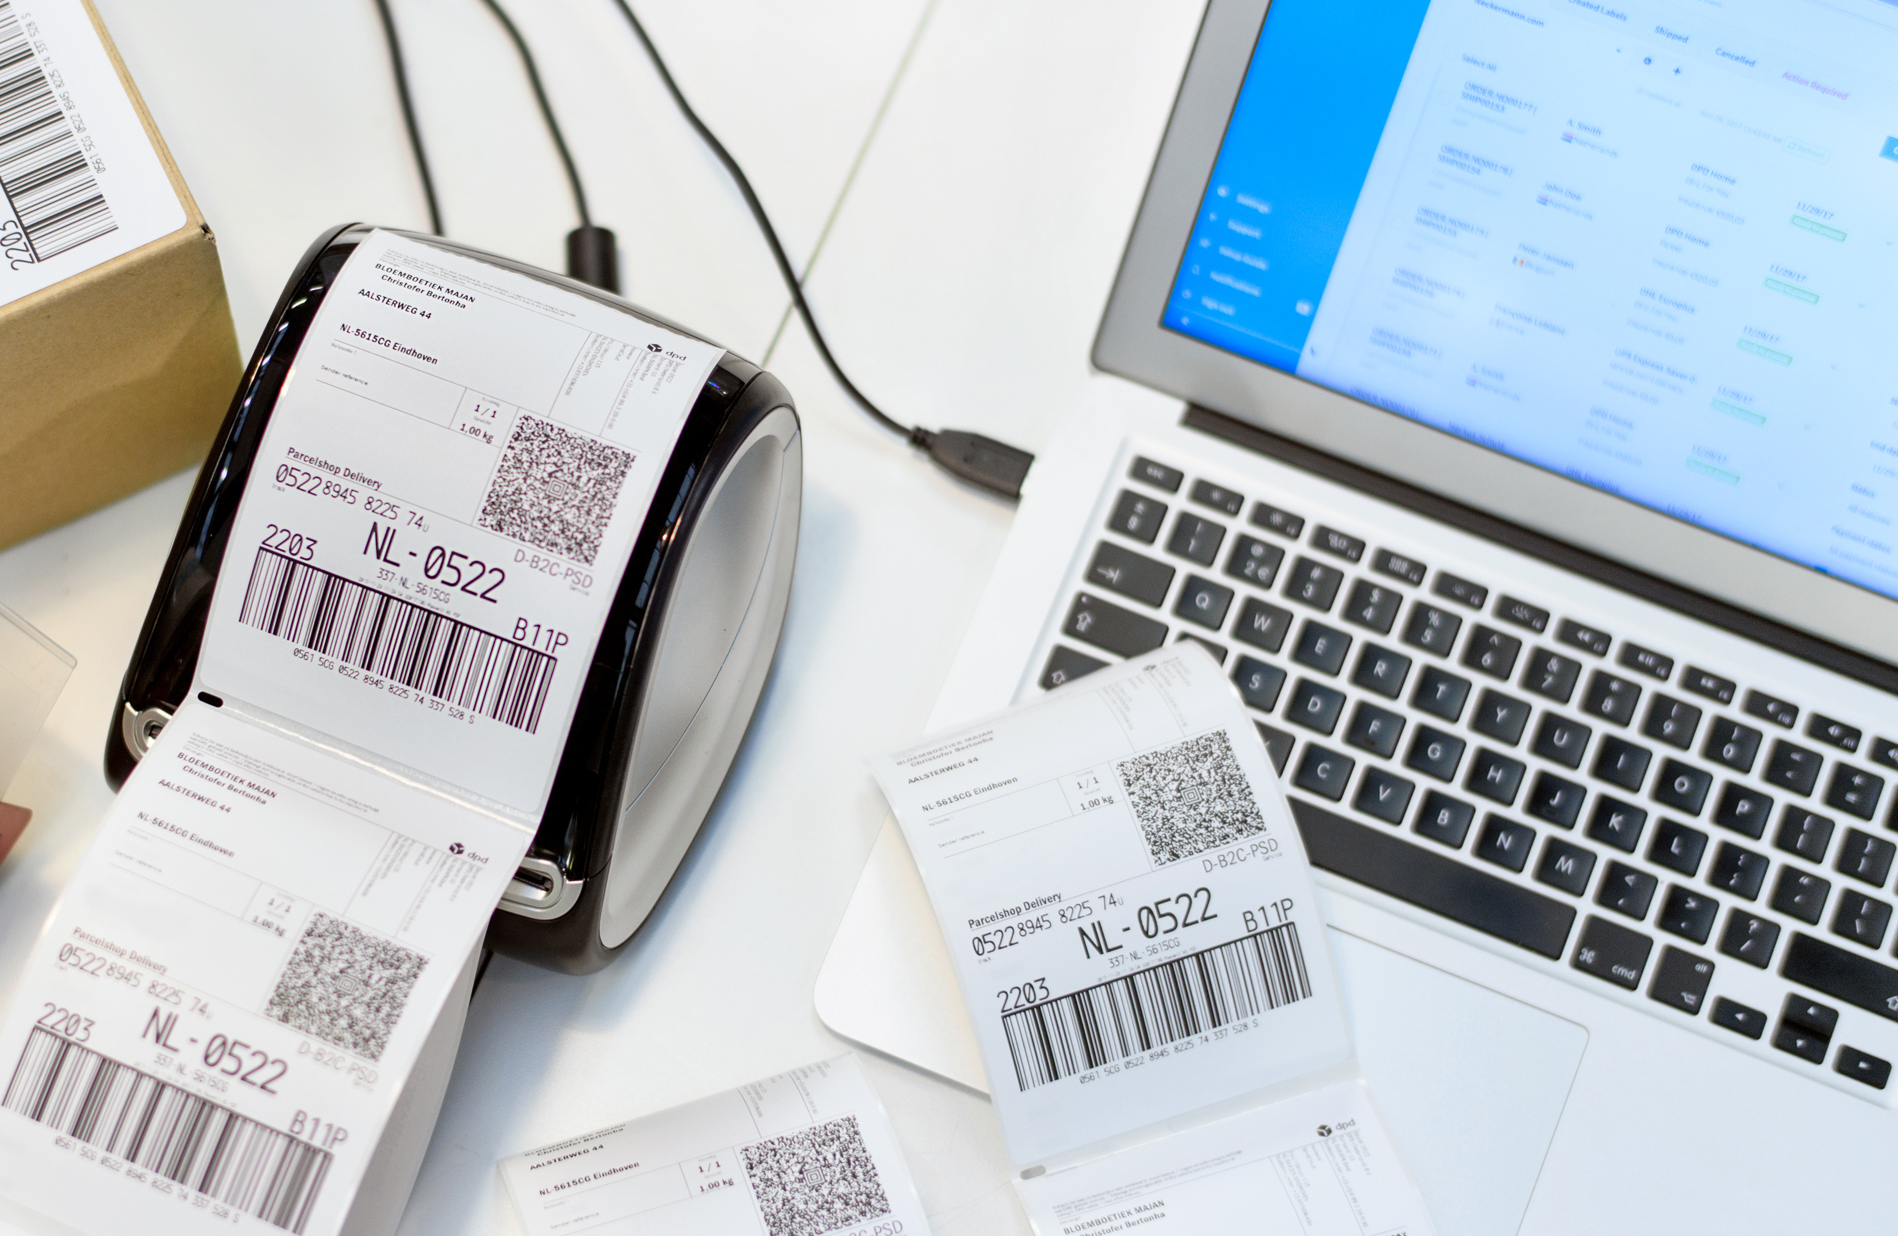
✔ Print labels in bulk: When your online store is connected to Sendcloud, your order overview will automatically show all your incoming orders. Select all the orders you would like to process and hit the print button. The status of any shipment can be easily tracked in the “shipped” tab in your Sendcloud environment. Need more details on a status? You can access the detailed statuses by viewing a specific parcel. On the right hand side of the screen you will see the full track & trace history of the parcel.
✔ Print shipping labels in just one click: Skip downloadable pdfs. By installing the Sendcloud printer app it’s possible to link any printer and print labels in just two clicks. It’s not necessary anymore to adjust your printer settings for any type of printer you use.
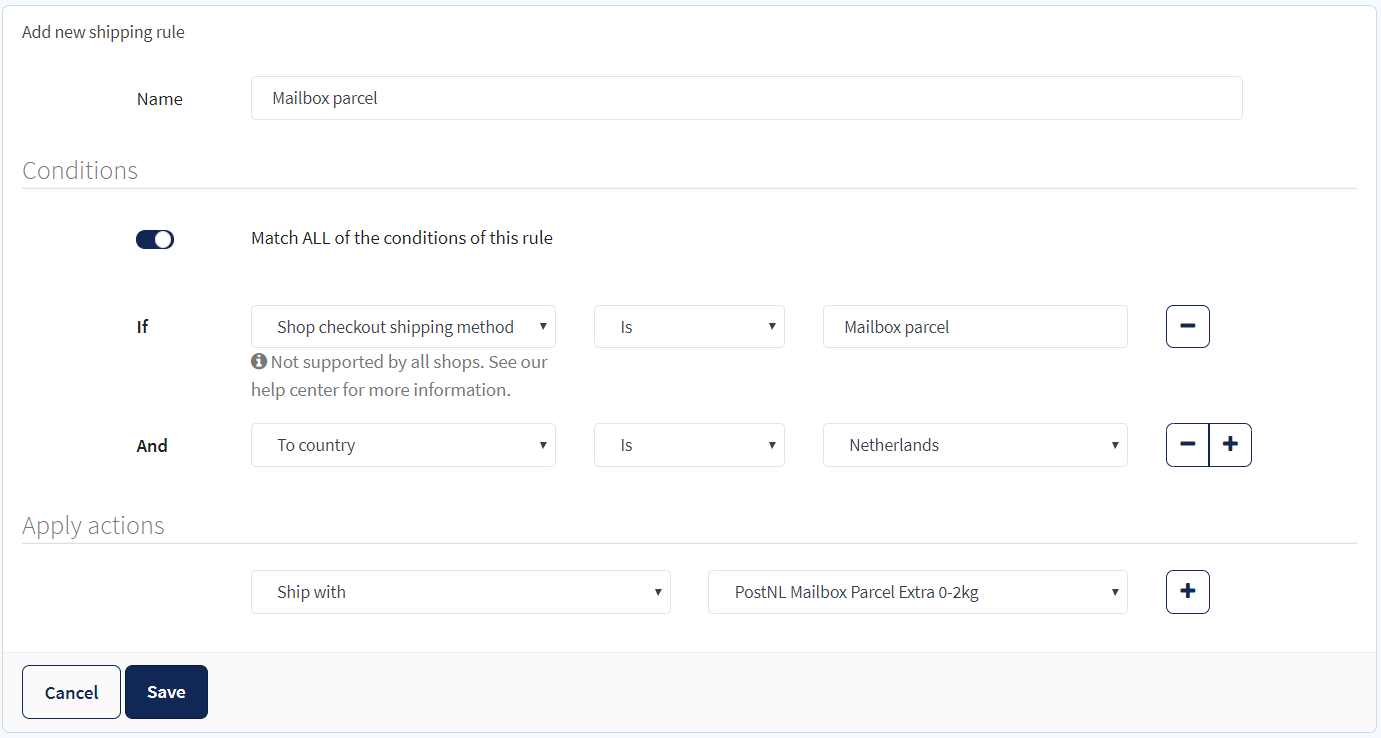
✔ Smart Shipping rules: Do you want to save even more time? Set custom rules so that the correct shipping option automatically appears on your label. This is useful for when you offer when you ship with multiple carriers, ship to multiple countries or have several delivery options available. You can set up your smart shipping rules easily here.
✔ Pack & Go: Use a barcode scanner or process orders via the automatic mode. From your Pack & Go overview, you can print your picking lists and packing slips together with shipping labels.
✔ Pick lists: Use scannable picking lists for your order pickers, this will improve your control and flexibility over your orders. Directly scan the picking lists to create the right shipping label.
✔ Parcel detail view: When using Pack & Go you’ll be able to see all the details of an order. Check what items belong to an order and pick and pack them via your on-screen detail view or the above described pick lists.
✔ Use across multiple warehouses or packing stations: Your employees can pack orders and print shipping labels at the same time, your Pack & Go overview is continuously updated when an order has been processed.
✔ Printing packing slips simultaneously: Do you wish to send a packing slip? This can be printed automatically alongside your shipping label.
✔ Automation of custom documents: When you ship with Sendcloud, we automatically provide you with the customs documents and a commercial invoice. This is required when shipping parcels outside the EU.
Use smart shipping rules to automate how orders are processed
Not all products you ship will need the same treatment, with smart shipping rules you can organise how you want certain products to be processed. Assign variables such as carrier methods, insurance, brands and more to your store items. You can add as many shipping rules as you like.
Below are two case studies on how smart shipping rules can help with branding and international shipping:
Case study 1. Multiple shops? Automatically use the correct brand! Below is a case study of how a smart shipping rule can be applied to distinguish one brand from another.
An online retailer has multiple stores listed under the same Sendcloud account. Each online store has a different name (with different branding) and so they are each listed as a different integration. However, they are all shipped from the same warehouse location.
The solution? Created a smart shipping rule for each store integration as follows:
- If “Integration” is Brand X (the condition), then “Ship with address” Brand X.
Using their smart shipping rules this way distinguishes each brand from each other clearly via the label.
Case study 2. International shipping? Use multiple shipping rules for carrier selection.
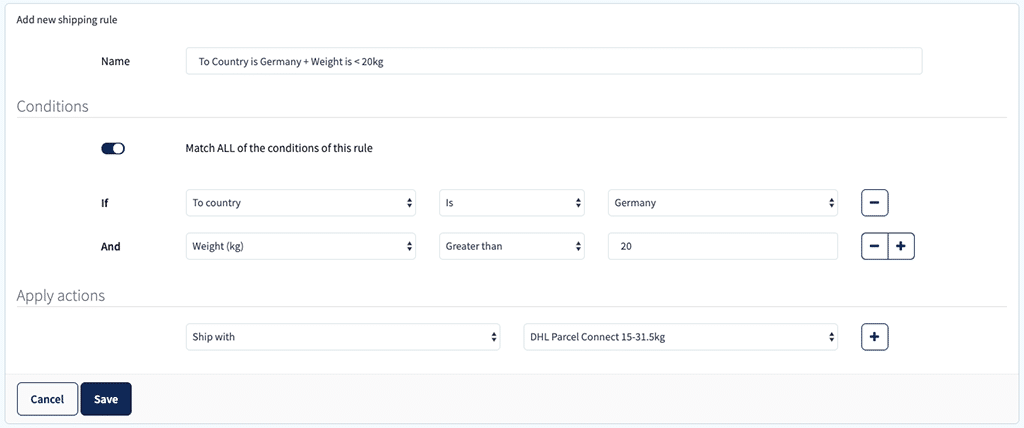
You can use smart shipping rules to ensure the most suitable carrier and shipping method is used if an order is delivered to a certain country. These types of rules generally look like this:
- If “To Country is” Germany (the condition), then “Ship With” DPD Home (the action)
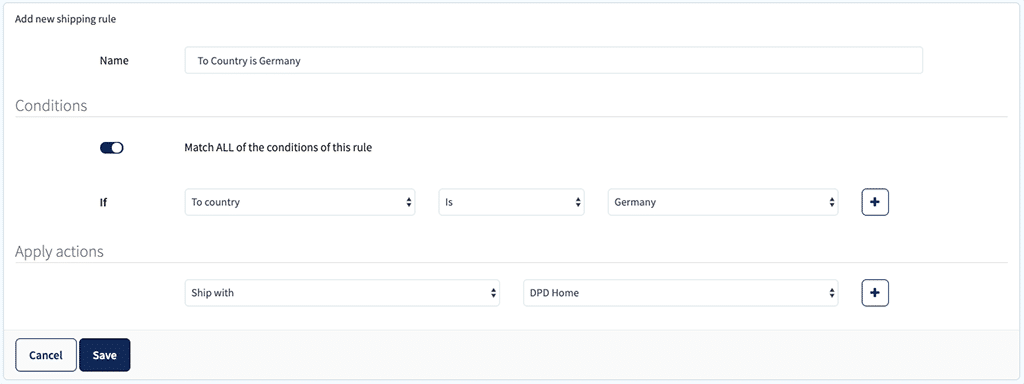
- If “To Country is” Germany (The condition) and “Weight is greater than” 20kg (the condition), then “Ship With” DHL DE (the action)
Smart shipping rules eliminate the need for employees to spend their time checking the order’s destination then manually adding the correct shipping method. The above examples in this article are just a small selection of the possibilities of smart shipping rules, to learn how to set up your first smart shipping rule please refer to our help center article ‘How to profit from smart shipping rules’. We hope it inspires you to ship smarter and save more time.
💡 Please note that our smart shipping rules are applied in the order they are listed in the smart shipping rules overview. Therefore, later rules will overwrite the rules listed prior to them, and the last shipping rule in the list is the last to be applied, if applicable.
It’s important to carefully choose the order of your smart shipping rules, ensuring that no desired actions will be cancelled out by smart shipping rules listed further down in your overview.
Increase repeat purchases with delivery tracking
Remaining visible to your customers is important since customers expect proactive communication from retailers. Branding and automating your track & trace emails and offering a dedicated tracking page can help get your message across and increase your sales.
Tips for branding your track & trace emails and page
| Ensure that you reflect the look and feel of your brand | Your branded tracking page should feel like an extension of your website and not a separate entity. Take the time to set up your branding in Sendcloud, go to Setting and then Brands, here you can edit your logo and add custom colours. |
| Add an Instagram post | Advertise by adding an Instagram post and gain referrals to your Instagram account. Promoting a post is a great way to introduce yourself to some new potential followers while making your T&T more visually engaging. |
| Add a banner ad | Promote your products by attaching a nice promotion to your tracking page. Banner advertising is a good means to do this because it can help create brand awareness, generate leads and re-target an audience. |
| Send the right message at the right time | The moment between paying for the order and receiving it, is the most insecure period, as people don’t know what is happening to their parcels. Therefore it’s important to reassure them along the way with updates about where their parcel is. You can automate various parcel statuses with Sendcloud and reduce the number of questions regarding delivery. This is especially useful during peak periods. |
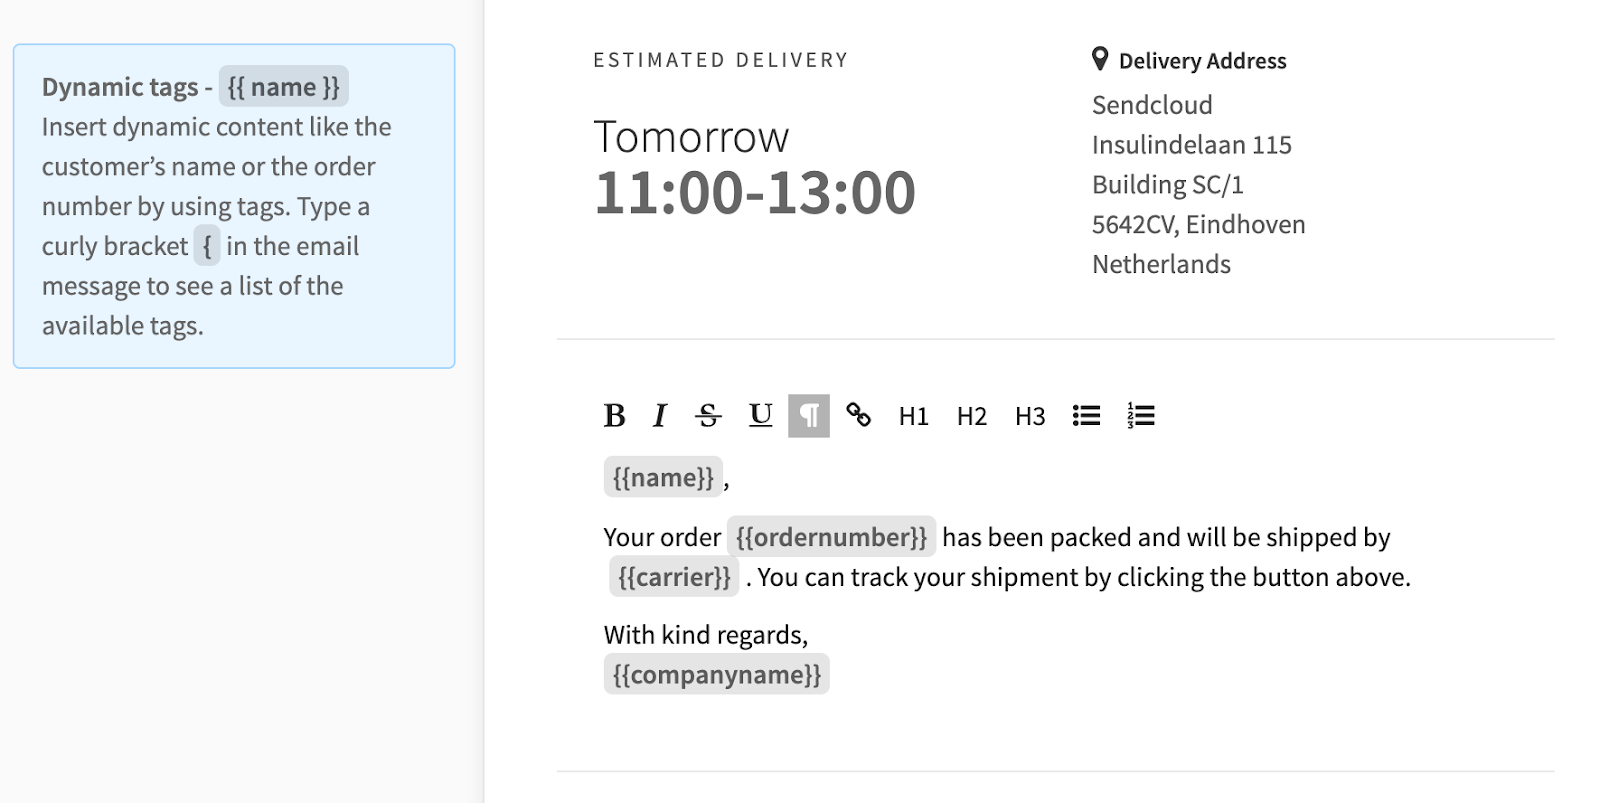
| A more personal message and encourage customer loyalty | Sendcloud allows for users to personalize their Track & Trace emails. You can adjust the text of the messages as you wish, for example using our dynamic tags you can automatically enter the name of your customer and the order number. |
Easily set-up your Track & Trace page and emails
Instead of being sent to the track and trace page of your carrier, Sendcloud allows you to set up your own custom Track & Trace page and emails which increases customer engagement with your brand. You can customise the content, logo and colours of your personal Track & Trace! What ‘s more, If you have multiple online stores, you can create a branded Track & Trace page for each store. Watch our video tutorial on how to create your brand and set up your Track & Trace page:
Once you have set up your Track & Trace page you can decide what type of message you want to send to you users and when. To set up your track & trace emails, simply go to the Sendcloud Settings and select Track & Trace. Here you will see T&T Emails where you can toggle the option “Send Track & trace emails to customers” to set as active. These status can help reduce the amount of customer queries regarding the status of your packages being delivered. The following parcel statuses can be enabled:
- Ready for shipment: This status will be sent ten minutes after label creation. You can disable this option if you do not ship your packages within one to two business day.
- Out for delivery: This status will be sent out when the package receives the first scan from the carrier. This indicates to the customer that the order is on its way.
- Delayed: This status will be sent if a package is delayed and will not be delivered at the previously indicated time. This status will reduce the number of customer queries received especially during peak periods.
- Ready for pick-up: This status will be sent when the package is ready for collection at the service point and is only applicable when the “Delivery to Service Point” shipping method is chosen. Since service points only hold packages for a limited number of days, having your customers know when to pick up their package is paramount.
- Delivered: This message is sent when the package has been successfully delivered. This is the final message sent to your users, make sure that you include a personalised message that will encourage return customers.
How can I personalize my Track & Trace Email?
Personalization encourages customer loyalty, that’s why we allow our users to customise their Track & Trace emails by simply adjusting the dynamic tag fields. The following labels are available for your Track & Trace emails:
{{tracktrace}} Shows the generated track & trace link.
{{name}} Shows the name of the recipient.
{{email}} Shows the email address of the recipient.
{{companyname}} Shows your company name.
{{ordernumber}} Shows the order number of the shipment.
{{carrier}} Shows the name of the carrier that belongs to the shipping method.
{{parcelstatus}} Shows the status of the package
Returns made easy
Return processes are often a reason for concern in ecommerce in terms of the cost of processing returns, staff, and resources. These all have an effect on the retailers’ profit margins.
While returns rates to offline stores are around 8%, this jumps to around 25-40% for items bought online.
✔ Keep customers happy: Create a return portal that enables customers to easily request a return online and print their label in one click.
✔ Reduce time spent: Spend less time coordinating product returns. Let customers choose their preferred return delivery method.
✔ Gain full control: Keep an online record of your returns, return reasons and say goodbye to unnecessary pre-printed return labels.
57% of retailers said that dealing with returns has a negative impact on the day-to-day running of their business
Your customers can return an item by following 4 simple steps
- When a consumer opens the return portal to issue a return, they are asked to provide their postal code and the order or track & trace number which are located in the track & trace emails sent after the label is created.
- In the second step, customers can pick what items they want to return along with the reason. When setting up the return portal, set custom ‘Return Reasons’. If the customer can not find their reason they can simply enter in the ‘Other’ text box.
- After the customer has picked which items to return, they can choose from a list of refund methods that you offer ‘money back, store credit or exchange’. Once you have selected a refund method, be sure that you can accommodate for it eg. If you select the ‘money back’ method please check that you have set up your payment service provider in your shop settings.
- Finally the customer confirms the return, Once the return is created, you will be able to track it and process it in the returns tab in the Sendcloud environment.
A whopping 96% of consumers state that they would shop again based on a good return experience
Seamless customer experience
✔ No need to print return labels: Once you have created the return label you can email it to your customer, this saves time and money.
✔ Branded self-service returns portal: The Branded Returns Portal is a web page with your custom store branding. Here your customers can easily create their own return labels, without having to contact you.
✔ Proactive tracking and notifications: Track your returns from request to item delivery, and keep customers up to date via email.
✔ Flexible return options: Give customers the option to drop off their return at a service point or return in-store. You should try to communicate the possibilities for returning shipments clearly on your website for example in the footer or terms and conditions page.
How will you automate your e-commerce logistics, and save time? Do you still have any questions about how to automate your shipping process? Feel free to leave a comment below, or get in touch with our team for more in-depth assistance.

